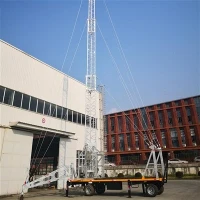

If you're reading this, chances are you're part of the telecom, broadcast, or rural connectivity space-someone who knows that a 120ft guy mast is more than just a tall metal pole. For years, our team has supplied these masts to clients who need reliable, elevated signal transmission, but we've noticed a gap: many of you ask how to power the equipment on these masts once they're installed. Solar panels are the go-to solution for off-grid sites, but mounting them on a 120ft guy mast isn't as simple as hanging them on a backyard fence. It requires careful planning, adherence to safety standards, and an understanding of how both the mast and the solar system work together. As a 120ft guy mast supplier with decades of experience, we've walked clients through this process hundreds of times, and today we're breaking it down step by step-no overly technical jargon, just practical, actionable advice that's saved our customers time, money, and downtime.
Before you touch a single solar panel, let's talk about why this process is specific to 120ft guy masts. Unlike self-supporting towers or portable options like our Cell On Wheels Mobile Telecom Tower, guy masts rely on guy wires anchored to the ground for stability. That means mounting hardware has to account for not just wind loads and solar panel weight, but also the tension on those guy wires. A mistake here isn't just a costly one-it's a safety hazard. We've seen clients try to skip the pre-planning stage and end up with panels that vibrate loose, or even damage the mast's structural integrity. So let's start with the non-negotiables: pre-installation assessments.
First, you need to confirm that your 120ft guy mast is rated for additional load. Our masts are engineered to handle specific static and dynamic loads, including the weight of telecom equipment, antennas, and now solar panels. Check the manufacturer's load specification sheet-this should tell you the maximum additional weight the mast can support at different heights. For most of our standard 120ft guy masts, the safe additional load at the top 10ft (where solar panels are best mounted to avoid shading from antennas) is around 150 lbs, which is enough for 2-3 standard 250W solar panels and a small charge controller. If you're planning a larger solar array, you may need to mount panels lower down, but keep in mind that lower mounting can lead to more shading from nearby trees or buildings, reducing efficiency.


Next, site analysis. Solar panels need unobstructed sunlight for most of the day, so use a solar pathfinder tool or a free online app like SunCalc to map shading from 9 a.m. to 3 p.m. (the peak sunlight hours) at your mast site. For a 120ft mast, shading from a tree 50ft away won't be an issue if you mount panels at the top, but a building 100ft to the south could block morning or afternoon sun. Also, check local wind speeds-your area's 50-year wind load is critical here. Our masts are tested to withstand winds up to 100 mph, but solar panels and mounting hardware add drag, so you need to choose components rated for the same or higher wind speed. For example, in coastal areas where wind can reach 120 mph, we recommend using panels with a low-profile design and mounting brackets that clamp rather than bolt, to prevent lift.
You'll also need to check local zoning and building codes. Many areas require permits for structures over 50ft, and adding solar panels to a guy mast may trigger additional inspections. Some rural areas have fewer restrictions, but urban or suburban locations may require proof that the mast and solar array don't interfere with radio frequencies or pose a safety risk to nearby properties. We always advise our clients to confirm these requirements before purchasing any equipment-we don't want you to get stuck with a mast and panels you can't legally install.
Now that you've done the pre-work, it's time to choose your solar components. This is where many people cut corners, but it's crucial to pick parts that work with your 120ft guy mast. First, solar panels: monocrystalline panels are the most efficient, perfect for limited space at the top of a mast, and they hold up well in extreme temperatures. Avoid thin-film panels-they're less durable and more prone to damage from high winds. As we mentioned earlier, stick to 2-3 panels for a standard 120ft mast, each around 250-300W. Any more than that will exceed the mast's load capacity at the top.
Next, mounting hardware. This is the most important part of the process. You need brackets that are designed specifically for guy masts-generic roof brackets won't work, because they don't account for the mast's cylindrical shape and the tension from guy wires. We recommend U-shaped clamps that wrap around the mast and have adjustable arms to hold the panels at a 15-30 degree angle. The angle is key: at 120ft, the sun's angle is lower in the morning and evening, so a steeper angle (25 degrees) will capture more sunlight. For even better results, use brackets that let you tilt the panels seasonally-this is easy to adjust and can increase your annual energy production by 10-15%. Make sure all hardware is made of hot-dipped galvanized steel to resist rust, which is a big issue in outdoor settings. Avoid aluminum brackets-they're lighter, but they corrode faster when exposed to moisture and salt.
You'll also need a charge controller, a deep-cycle battery, and an inverter (if you need AC power for your telecom equipment). The charge controller regulates the power going from the panels to the battery, preventing overcharging, which can shorten the battery's life. For 2-3 250W panels, a 30A PWM charge controller works, but if you're using higher-efficiency panels, go for a 40A MPPT controller-it's more expensive, but it captures up to 20% more power, which is worth it for off-grid sites. The battery should be a lead-acid deep-cycle battery, sized to power your equipment for 2-3 cloudy days. For example, if your equipment uses 500Wh per day, a 100Ah 12V battery will give you enough power for two cloudy days. Store the battery in a weatherproof enclosure at the base of the mast, not at the top-this reduces load on the mast and makes maintenance easier.
Now, let's get to the installation process. This is where safety is non-negotiable. A 120ft guy mast is tall, and working at that height is dangerous if you don't have the right equipment. First, hire a certified tower climber-we don't recommend doing this yourself, even if you have experience with ladder work. Tower climbers have the training and gear (harnesses, safety lines, helmets) to work at heights, and they're familiar with the specific hazards of guy masts, like loose guy wires or unexpected wind gusts. If you're using a portable setup, some clients use our Cell On Wheels Mobile Tower or Portable Radio Telescopic Antenna Cell On Wheels Telescopic Antenna Tower for temporary sites, but for a permanent 120ft mast, professional installation is a must.
Before you climb, prep all your components. Lay out the panels, brackets, clamps, and wiring at the base of the mast, and label everything to avoid confusion. Test the wiring first-connect the panels to the charge controller and battery at the base, make sure the system is working, so you don't have to haul faulty parts up the mast. When you're ready to climb, the tower climber will secure a safety line to the mast at two points: one for their harness, and another to haul up the panels and hardware. They'll attach the mounting brackets to the mast at the pre-measured height (usually the top 10ft, as we discussed earlier), making sure the brackets are level and tight. A good rule of thumb is to use two clamps per bracket-this prevents the brackets from shifting if a wind gust hits.
Once the brackets are secure, the climber will attach the solar panels to the brackets, using stainless steel bolts (no galvanized bolts here, as they can seize up over time). They'll run the wiring down the mast, using cable clamps to secure it to the mast every 5ft, so it doesn't flap in the wind and damage the insulation. Make sure to leave enough slack at the top and bottom for movement-if the wiring is too tight, it can rip out of the panels or charge controller. At the base, connect the wiring to the charge controller, battery, and inverter if needed. Test the system again: the charge controller should show that the panels are producing power, and the battery should be charging.
After installation, there's a critical step we always emphasize: inspection and testing. The day after installation, go back and check all the brackets and bolts-vibration from the wind can loosen them, especially in the first few days. Use a torque wrench to make sure all bolts are tightened to the manufacturer's specifications. Check the wiring again for any damage, and make sure the battery enclosure is sealed to keep out water and rodents. You should also monitor the system for the first month-keep track of how much power the panels are producing, and adjust the angle if they're not getting enough sunlight. For example, if your panels are facing east-west, they'll get morning or afternoon sun, but not both-tilting them toward the south will balance out their daily production.
We've heard from clients that this process seems overwhelming at first, but when done right, it's a reliable way to power your 120ft guy mast without relying on grid power. Solar panels reduce your operating costs, lower your carbon footprint, and make your mast usable in remote areas where running electricity is expensive or impossible. Our team has worked with clients on everything from small rural telecom masts to large broadcast towers, and we've found that following these steps consistently leads to long-lasting, efficient solar setups.
If you're not ready to tackle this alone, or you need a 120ft guy mast tailored to your solar power needs, we're here to help. We don't just supply masts-we partner with clients from site assessment to final installation, making sure every part of your setup works together. Whether you need a permanent mast or a temporary solution, our range includes options like the Cell On Wheels Mobile Tower, COWs Trailer Type Communication Tower, and Galvanized Self Supporting ASTM A36 Mobile Cell Tower, all designed to be compatible with solar power systems. We've seen firsthand that the right mast and solar setup can transform a connectivity project, bringing service to areas that needed it most.
Don't let the process intimidate you. With the right planning, components, and professional help, mounting solar panels on a 120ft guy mast is a manageable, cost-effective solution. If you have questions about our masts, solar compatibility, or installation support, reach out to our team to discuss your project. We're here to make your connectivity goals a reality, one mast at a time.
References
- National Electric Safety Code (NESC) 2023, Article 125: Overhead Communication Lines
- Telecommunications Industry Association (TIA) Standard 222-G: Structural Standard for Antenna Supporting Structures and Antennas
- International Code Council (ICC) 2021, Chapter 15: Miscellaneous Structures
- Solar Energy Industries Association (SEIA) Best Practices for Off-Grid Solar Installations
- Manufacturer's Load Specification Sheets for 120ft Guy Masts (our in-house engineering documentation for standard models)